Convert your blogger into an own website


There are many peoples who want to convert their blogger in own domain name, especially beginner. But they fail to do because they don’t know process. Converting blogger to a website is a very easy and simple process. Fir this you need to purchase the domain. You can purchase it from any of domain hosting site like Go daddy, Web.com. I page. Or you can buy through blogger Google custom domain. These all are world top domain hosting site. You just search there for available domain name for your blogger and register then buy. Now you have your domain name.

Here are the steps for set up custom domain name from other domain hosting site like Go daddy.
Blogger set up steps
1>      Go to your blogger account dashboard.
2>      Then go to Setting – basic – publishing
3>      After that click on add custom domain, then open switch to advance settings.
4>      Now enter your URL to switch and then use a missing files host( if needed , usually you don’t need it) now save.


Here you have done your work in blogger now you need some change in your hosting account.
Hosting account setup
1>      Open your hosting account ( where you register for your domain name like Go daddy)
2>      Then go to your DNS management or DNS setting.
3>      Now click on add new record
4>      Here you need to enter details as shown bellow.

1>      Go to CNAME records here delete the CNAME record that has host of www
2>      Now you add new CNAME Record, Enter all detail as below.


1>      Now you done. Your changes will reflect within two hour and make sure of CNAME Record. Your blog will changed in website shortly.
 If you faced any problem then you can comment here but i am sure you not faced any difficulty because it really simple and when you implement this Google blogger team will suggest you by notification and information’s.


How to add horizontal menu with sub tabs in two columns for blogger

This horizontal view is very impressive and handy this will give professional look to your blogger. This view is save your space and arranges all post in short attractive line.
 Follow these simple steps:-
1:- in your blogger dashboard go to blogger layout and click on the “add a gadget” option in your header image than now select a HTML/java script option.

2:- here you can past following code into widget and leave blank title section

<div id='menucol'>
<div id='topwrapper'>
<ul id='top'>
<li><a href='
http://YOUR DOMAINE.com'>Tab 1 Title Here</a></li>
<li><a href='
http://YOUR DOMAINE.com'>Tab 2 Title Here</a></li>
<li><a class='submenucol' href='
#'>Tab3 Title Here</a>
<ul>
<li><a href='
http://YOUR DOMAINE.com'>Sub Tab 3.1</a></li>
<li><a href='
http://YOUR DOMAINE.com'>Sub Tab 3.2</a></li>
<li><a href='
http://YOUR DOMAINE.com'>Sub Tab 3.3</a></li>
<li><a href='
http://YOUR DOMAINE.com'>Sub Tab 3.4</a></li>
<li><a href='
http://YOUR DOMAINE.com'>Sub Tab 3.5</a></li>
<li><a href='
http://YOUR DOMAINE.com'>Sub Tab 3.6</a></li>
</ul>
</li>
<li><a class='submenucol' href='
#'>Tab4 Title Here</a>
<ul>
<li><a href='
http://YOUR DOMAINE.com'>Sub Tab 4.1</a></li>
<li><a href='
http://YOUR DOMAINE.com'>Sub Tab 4.2</a></li>
<li><a href='
http://YOUR DOMAINE.com'>Sub Tab 4.3</a></li>
<li><a href='
http://YOUR DOMAINE.com'>Sub Tab 4.4</a></li>
<li><a href='
http://YOUR DOMAINE.com'>Sub Tab 4.5</a></li>
<li><a href='
http://YOUR DOMAINE.com'>Sub Tab 4.6</a></li>
</ul>
</li>
<li><a class='submenucol' href='
#'>Tab5 Title Here</a>
<ul>
<li><a href='
http://YOUR DOMAINE.com'>Sub Tab 5.1</a></li>
<li><a href='
http://YOUR DOMAINE.com'>Sub Tab 5.2</a></li>
<li><a href='
http://YOUR DOMAINE.com'>Sub Tab 5.3</a></li>
<li><a href='
http://YOUR DOMAINE.com'>Sub Tab 5.4</a></li>
<li><a href='
http://YOUR DOMAINE.com'>Sub Tab 5.5</a></li>
<li><a href='
http://YOUR DOMAINE.com'>Sub Tab 5.6</a></li>
<li><a href='
http://YOUR DOMAINE.com'>Sub Tab 5.7</a></li>
<li><a href='
http://YOUR DOMAINE.com'>Sub Tab 5.8</a></li>
</ul>
</li>
<li><a href='
http://YOUR DOMAINE.com'>Tab 6 Title Here</a></li>

</ul>
<br class='clearit'/>
</div>
</div>
Now you bready to customize your main tab or change them into whatever you want. You can delete or add main according your need.
<li><a href='http://YOUR DOMAIN.com'>Tab 7 Title Here</a>
<ul>
<li><a href='
http://YOUR DOMAIN.com'>Sub Tab 7.1</a></li>
<li><a href='
http://YOUR DOMAIN.com'>Sub Tab 7.2</a></li>
<li><a href='
http://YOUR DOMAIN.com'>Sub Tab 7.3</a></li>
</ul>
</li>

STEP 3:- go to template option for adding CSS style in our template
TEMPLATE > EDIT TEMPLATE
Now click on the side way arrow nest to <b:skin> here you search for <b:skin> by using CTRL+F keys and past  this code above <b:skin>


  /* Horizontal menu with 2 columns
----------------------------------------------- */
#menucol {
width:940px; 
height:37px;
background-image: -moz-linear-gradient(top, #666666, #000000);
background-image: -webkit-gradient(linear, left top, left bottom, color-stop(0.00, #666666), color-stop(1.0, #000000));
filter: progid:DXImageTransform.Microsoft.Gradient(gradientType=0,startColorStr=#666666,endColorStr=#000000);
border-bottom:1px solid #666666;
border-top:1px solid #666666;
margin:0 auto;padding:0 auto;
overflow:hidden;
}
#topwrapper {
width:940px; 
height:40px;
margin:0 auto;
padding:0 auto;
}
.clearit {
clear: both;
height: 0;
line-height: 0.0;
font-size: 0;
}
#top {
width:100%;
}
#top, #top ul {
padding: 0;
margin: 0;
list-style: none;
}
#top a {
border-right:1px solid #333333;
text-align:left;
display: block;
text-decoration: none;
padding:10px 12px 11px;
font:bold 14px Arial;
text-transform:none;
color:#eee;
}
#top a:hover {
background:#000000;
color:#F6F6F6; 
}
#top a.submenucol {
background-image: url(https://blogger.googleusercontent.com/img/b/R29vZ2xl/AVvXsEhUlOmIQEX6NOAHC7WGaPes-IlIzEsns6X9cr2Z831uR2aHcwB9tzzLZhoaI6j5F7vobUIjbkQ6mPfZjAy7C6tM0nXIlaG8HfpUQA0fP1Zhbc-CHCiE4-jnTYSfDPVD2CjTKk_TmkCdm88/s1600/arrow_white.gif); 
background-repeat: no-repeat;
padding: 10px 24px 11px 12px;
background-position: right center;
}
#top li {
float: left;
position: relative;
}
#top li {
position: static !important; 
width: auto;
}
#top li ul, #top ul li {
width:300px;
} 
#top ul li a {
text-align:left;
padding: 6px 15px;
font-size:13px;
font-weight:normal;
text-transform:none;
font-family:Arial, sans-serif;
border:none;
}
#top li ul {
z-index:100;
position: absolute;
display: none;
background-color:#F1F1F1; 
margin-left:-80px;
padding:10px 0;
border-radius: 0px 0px 6px 6px;
box-shadow:0 2px 2px rgba(0,0,0,0.6);
filter:alpha(opacity=87);
opacity:.87;
}
#top li ul li {
width:150px; 
float:left;
margin:0;
padding:0;
}
#top li:hover ul, #top li.hvr ul {
display: block;
}
#top li:hover ul a, #top li.hvr ul a {
color:#333; 
background-color:transparent;
text-decoration:none;
}
#top ul a:hover {
text-decoration:underline!important;
color:#444444 !important; 
}


Almost you  have done everything  now you just find with CTRL+F this line /*tabs, this will also have some little beneath /* tabs
Just blow these line , delete the code below until you reach at /*columns
Here you add this code that you have deleted.

 #crosscol ul {z-index: 200; padding:0 !important;}
#crosscol li:hover {position:relative;}
#crosscol ul li {padding:0 !important;}
.tabs-outer {z-index:1;}
.tabs-inner {padding: 0 0px;}

Step 4:- final step, save all your work by save button and view your blog there you will see your beautiful navigation menu below header.
Arrange your tabs like this.


How to add tabs for blogger

Blogger is a most famous platform for blogs, you can share view, opinion with peoples without having website, and blogger have also many features like website such as adding tabs in menu bar for look professional.  You can add tabs in your blogger by two methods.
 
   Ø  Using pages
   Ø  Direct from layout

Method 1:

This method is easiest; add tabs by using blogger layout

 Ø        First log in to blogger dashboard
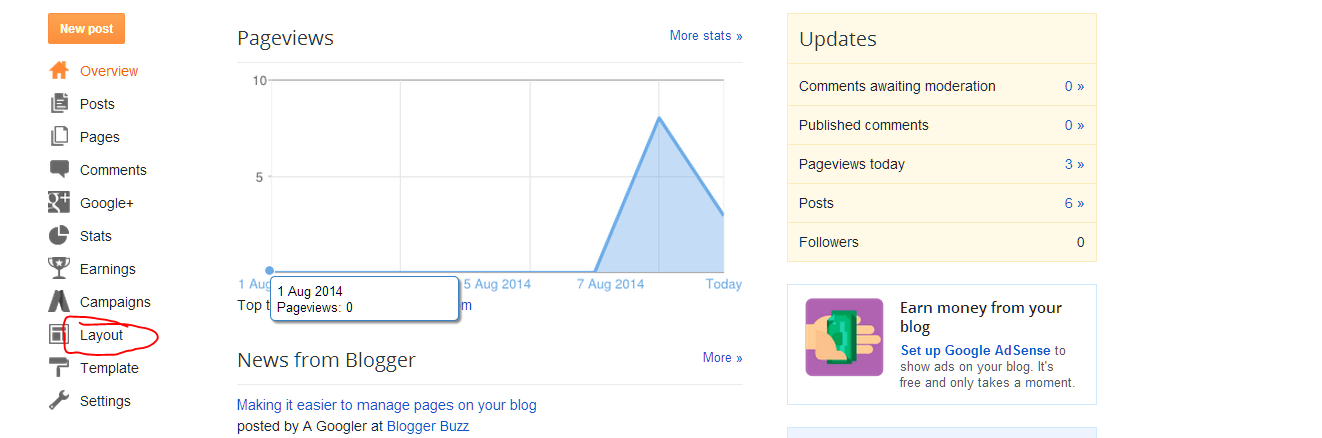
 Ø   Click on layout option form left panel
 Ø  now click add a gadget from the top and add your pages from the option ( pages that you created)
 Ø  after selected  click on save arrangement and view blog you will see your tabs

Note: make your tabs like, contact us, report us, service, etc.

Method 2:  

     This method is direct allowing you to add pages to show as top tabs.
 Ø   First sign to blogger dashboard
 Ø   Click on the page button from left panel
 Ø If there you did not create any page then you will see only home button.
 Ø Now search for show page as- choose top pages
 Ø   Now click on the new page button to create a new page or choose blank page
 Ø  Now you can arrange the position of the pages by dragging them  


WATCH VIDEO FOR MORE HELP

Advertising