How to fix wifi not obtaining ip address error in android

In android device wifi is most important part of android. wifi help to connect to internet in high speed as compared data connection in limited range. Wifi is mostly used in companies,colleges and homes. In android some times peoples face problem with wifi like wifi is not obtaining ip address and not getting connected with wifi so today I tell you the how to solve this problem.
Follow these three methods to solve this problem
Manually set ip address
1 Go to settings->WiFi  and networks->WiFi settings->long press on wifi network->Select modified wifi-> show advance
2 now click   ‘ select static IP ‘
Enter these values-
  • IP address : 192.168.1.128
  • Gateway: 192.168.1.1
  • Network prefix length: 24
  • DNS1: 8.8.8.8
  • DNS2: 4.4.4.4
application wifi fixer
1 download wifi fixer app from google play store
2 now run the app and your problem get solved

USSD code
1 Restart your android and Dial *#*#526#*#* to reset the wifi driver


How to block ads on your Android

Ads and pop up windows opened automatically in android phones is very annoying thing. That’s by all of us wanted to block then in our android phones. In desktop computer it is easy by just installing ad blocker software in computer but in android it is most of us don’t know how to block ads and pop up windows in our android phones. These ads and pop up window are not only annoying you know they also use your lots of internet data. When you open a website page there is many video ads are playing in sides and you don’t recognize your download link in between them. To solve all this problems today i am going to tell you how to block ads and pop up windows in android phone

Step by step

For rooted android phones
  1.  first you have to download adblock plus app from internet
  2.  install adblock plus app in you android phone (to install it you have to enable unknown sources in you security setting in system setting)
  3.  If your rooted adblock plus app will ask you for superuser permission grant it and you are done.

For unrooted android phones
  1. downloads adblock plus app from internet
  2. install adblock plus app in you android phone (to install it you have to enable unknown sources in you security setting in system setting)
  3. Now you have to modify you proxy settings. Go to setting and select wifi which you use to access internet long press on it and select modify network
  4. go down and open advance option and change the proxy setting to manual and then you just need to change the proxy hostname field to localhost and the proxy port to that number that your adblock plus app is told you to change it to. Mostly it was 2020.
  5. You are done keep browsing without any pop up ads.


How to install custom rom in android

What are ROMs

Rom is the operating system software that runs your android. The rom is stored in the read only memory portion of hardware in your android phone. The manufactures of your android phone will gives you phone with already installed stock rom but if you are not happy with your stock rom you can also install custom rom in your android phone by first rooting your phone. When you rooted your android phone you have gain ability to install custom roms in your android phone. The custom rom will change appearance of your android, gives you great user interface, improve performance and efficiency, improve battery life and install modified version of android.

How to flash or install custom rom in android
Step by step

1 first root your android phone
2 now make a back you your phone
3 download and install ROM manager from Google play
4 open the ROM manager that you install and install custom recovery then it ask you to “confirm phone model” then select your model and after that select flash “clockworkmod recovery”
5 now connect your phone with computer via original usb cable and download driver of your phone mostly the drivers are automatically install when you connect your phone via usb cable with computer and when your phone does not install it automatically then you have to manually install it from its manufacturers website
6 now go “cyanogenmod.org/devices” website in computer and select your device.
7 now select the version you want mostly people select nightly versions because they are latest.
8 download the version you want to use. The top one is the latest version.
9 now you will need Google apps(gapps) download it from this link “wiki.cyanogenmod.org/w/Google_Apps”
10 download the version which belongs to your rom version.
11 rename ROM and Gapps file to short and easy and put them in root folder of your hard drive.
12 go to the folder where you have adb files (link below)
13 shift + right click the window and open cmd there
14 type in: adb push ‘path to ROM’/sdcard/
15 do the same for gapps but change path now you done with computer
16 charge your phone at least 80%
17 boot into the recovery mode, holding power button+volume down
18 select wipe data and confirm it
19 choose install zip, find your rom, select it and confirm it.
20 repeat same process but instead of your rom, select gapps.
21 reboot the phone via menu
22 setup your phone again and enjoy new custom rom .     


How to use android as pc speaker

If you have not a speaker for pc to play sound then there is new ways to use your android as pc speaker to play sound .you don’t need spent money on buying speaker for pc. Its Sound was so amazing and clear and setting up your android as speaker for pc is so easy it does not required any wire or special connection and you also don’t need Smartphone with latest android version. You can be use any android phone to use as speaker for pc .there is a many apps which bring you this functionality but i am telling you about soundwire this apps gives amazing sound. You can download it from Google play in your android phone. Now i am telling you how to use android phone as pc speaker step by step.

steps :

1. Downloads and install soundwire in your android smartphone from google play

2. Now download soundwire server in your pc it is a source of music and web audio streaming.


3. After download and install both app in your android phone and desktop server in pc run both and make sure that they both should be on same network (wifi or same internet connection) when they both are on same network they connect automatically.

Related LinkHow to root android, 

4. In soundwire server you should have to select audio source in input select option. If you have windows 7 or 8 then default multimedia devise is good but windows xp users have to select it what you want .

5. After setting this now you can play what you want from android speaker and you can adjust volume level in sound server.
     

How to root android

Rooting is process by which you can remove all restriction that your manufacturer or carrier may have applied in the android phone and allow user to go deeper in the android sub-system.you can access the whole entire operating system of android as you want without any restriction. You can also run heavy and powerful apps in you android phone like greenfly etc to increase battery life. in rooted phone you can over clock or under clock your processor and you can also replace your firmware.

Before rooting User require to backup your current software and flashing a new custom rom.

How to root android

Step by step

1 First you need to fully charged you android phone you have at least 80% battery in your android phone before you start rooting process to avoid interruption during rooting process

2 Download “SRSRoot one click android root” software and install it in your computer


3 Download driver of you phone. Mostly phone will automatically install drivers when you connect it to computer but if your phone does not install driver than you have to download it from your manufactures website.

4 Now connect your android phone to computer by using USB cable that you have brought with your android phone

5 Enable “USB debugging” and “unknown source” on your device (you can find this in setting menu)

6 Run “SRSRoot one click android root” in your computer

7 Click one of the root option display in “SRSRoot one click android root”. “SRSRoot one click android root” will display specific instructions for your device. Follow instructions exactly that the display and wait till it’s finished.

8 After process finished your android phone will restart and a superuser app will automatically install in your android smart phone. Now you are a superuser and all restriction removed you can operate it as you want.


How to take a screenshot on android


In android taking screenshot is so easy but taking screenshot is not same for every android before I tell you how to take screenshot in android you have to check which version of android is running in your android phone. If you’re android phone is running on ice cream sandwich android and above it would be very easy but if your android phone is running on android 2.3 gingerbread or earlier it it also easy but not some of phone have not this feature they need to install open source application to take screenshot in android phone.
There are two methods to take screenshot in android phone:
  • taking screenshot by General method:
1 first you have to go to the screen or image that you want to capture. The screen function is capturing the entire screen that you open at the time of screenshot.

2 Now you have to press two physical buttons at same time:

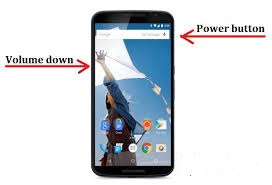
 (i)   In android phone which run on 4.0 android or above it. Just press power/lock button and down volume button at same time. If you not both button same time the screen is not capture. You have to do practise to press both button in same time and after you release both button. You see that a copy of your screen is shrinking into the frame and you hear a camera shutter sound that’s means your screen is captured.

(ii)   In other android Smartphone’s in which the power/lock button and down volume button is not working then you has to press power/lock button and home button of your android phone.
  • Taking screenshot by installing open source application

Some of android which is not have a feature to take screenshot by just pressing physical buttons. In these android phones you have to install an application to take screenshot. 


Advertising